Mountain Biking Review: Oh Chuck, How I Love You!

Chuck Lennon MTB Park, DeLeon Springs, Florida


Photo credit: http://chucklennonmtbtrail.weebly.com/
I first visited Chuck Lennon with my husband in July after he'd visited with a friend. When he returned from his ride, he was incredibly excited and couldn't wait for me to go with him. Unfortunately, my first experience came after Florida had a tropical storm, so the trails were flooded. We didn't ride, but walked through the trails to give me an idea of what was ahead. Aside from the four inches of water at the bottom of drops, it looked like a blast and I couldn't wait!  We returned to the park about two weeks later after learning on the park's FaceBook page that the conditions had improved and we could ride. 

The park at first doesn't seem like much. There is literally a parking lot, bulletin board, and a wooded trail entrance. Don't let it fool you. This 5.7 miles of trail is totally worth it; in fact, it is my absolute favorite series of trails!!  The parking lot is just around the bend from a picnic pavillion with a bathroom and there is a bike wash on the end farthest from the trail entrance.

The terrain is incredibly fun to ride on. Having ridden on many of Florida's diverse (surprisingly!) terrain, Chuck's is my favorite. It is a combination of hard packed sand, roots, forest floor, and areas of soft sand. When the conditions are right, it is perfect to ride upon. It does not have the tons of rocks like some of the limestone quarry trails like Santos and Alafia have...thank goodness. 

The initial trail, named Hoot Owl NW Trail,  is "blue" worthy, with a couple sit-on-your-tire drops, two of which I have taken my share of mouthfuls of dirt on going endo on. Remember, I'm still learning ;)  The trail leads to the intersection in the Central Hub, where all three main trails connect.  Inside are a yellow, red, and another blue trail, and each is worth the ride. 

The yellow, named Screaming Hawk, is the longest at 2.5 miles. If taken slowly, this ride can be a bit on the boring side, so take this one with some speed. It's a great cardio workout and you won't kill your legs. The skinny log ride is fun, leaving you only about a foot off the ground and easy to bail off of. The wooden tree bridge is cool, but stay LEFT. I veered right once and my tire hit where a notch in the wood had fallen off and endo I went.  There is one drop that is marked a red, and while it is the steepest, I personally don't think it's the hardest...hubby does, so to each his or her own!

Red Panther, the .75 mile most-challenging trail, is a doozy. The first drop is immediate with a left turn right at the top before the decent. From, there are a series of pump climbs and drops, some quite steep. Be prepared to put your bike out and have a blast. One right hand turn has a not-so-friendly palm tree waiting for the unsuspecting rider, so beware. It's one of those moments when you pull in your right leg and arm to avoid taking a chunk out. We met a guy who broke his hand on it.   Because this trail is short, you can be ride it multiple times if you choose.

Raccoon Run is the last trail is the trail that leads you back out to the parking lot and is my favorite of the three. It's a toned down version of Red Panther, but with more pump track style drops and climbs. I use to take this one slowly, paying more attention to technique rather than speed. The last time I rode with my husband he told me of a "sweet spot" the trail had when you take the right speed. So, he took off faster than our normal pace and man, was he right. This trail when taken quickly enough will allow your bike to move itself. You can fly on this trail. It's fantastic. I can't say enough, haha! 

I will put pictures up the next time we ride!  I hope you enjoy this trail!!


__________________________________________________________________
Some pictures along the way:

Time well spent with our teenager!


I'm Still Here!

Phew. Talk about Life Got In the Way. I haven't posted a decent post in months. Life has been busy with school (it's the single craziest year in my nine years of teaching...mostly from state mandates. Wee.), parenthood, Cross-Country, and our new family obsession: Mountain Biking.  There will be more about that in later posts, with reviews of my bike, Pegasus, and the trails we've trekked around the state of Florida. just touching base that we're alive, doing well, and kicking butt like always ;)

Pinterest Inspiration: Kate's Blog

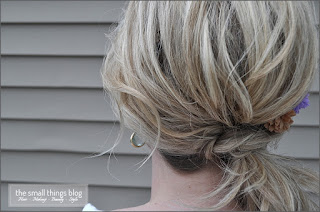
This summer I'm also exploring nail designs (now that my nails are finally long and strong!!) as well as Kate's beauty techniques from The Small Things Blog, which I ran across on Pinterest. Her blog taught me how to curl my hair (see early January) and now I'm tackling more of her hair projects.  Every time I try a style from her blog, I always get compliments, so it fuels my desire to keep trying. I never knew how to style my hair; I don't have the gift or patience. My hair, while I'm blessed with a beautiful color, isn't the easiest to work with. It's fine, but there's a ton of it. It doesn't hold much style, so when i try something, I have to dirty it up or pack it full of product. I've had to learn to set aside time in the morning to do it...that putting in the time is usually worth the effort. I'm a girl who would blow dry and be finished in 10 minutes tops, or I'd just throw it in a pony tail. Anyway, we're in the middle of teaching Kids College for the summer and since I have a little extra time in the morning from the later start and not having to get the kids up, I've been experimenting.  Here is my next trial:


This is the Half French Twist and it's very easy. I have to curl my hair and back come it for some volume, but it's worth it!!


Since I'm putting in work and time Tuesday for the Half French Twist, I'm going to resurrect the curl on Wednesday and try this one. It's a knotted pony tail and it's very cool. I've already given it a trial and it worked well. I'll try to find a way to make some type of 4th of July bobby pins...looks like another Pinterest dive for me!

Oh, poor neglected blog!

Life Got In the Way. That's the title of one of our favorite Sister Hazel songs, and it's often the sound track of our lives. Life has been so busy since the last time I blogged. But, now that summer has graced us with its presence, I have some more time. Some. Not tons yet, but it's better.

In the mean time, we've been busy with the end of school, the end of soccer season, redesigning our music room, and repainting the interior of our house (a huge task, let me assure you). All three are finished (except painting the doors), so now we turn to our own personal projects. This summer, we are taking time for ourselves: date times for the two of us, family outings, and projects on our own. 

The blog is about to get a make-over. I've got to sit and find a way to make each tab work correctly. I have an adventure to add to the Outdoors tab which included my husband and I kayaking down a swift flooded river and not being able to find our pull out point...while we were miles away from any civilization. Yes, it was awesomely fun!! :)

Anyway, stay tuned!!

Pinterest Inspiration: Cup Light and Chalkboard Paint

Yeah, my lab is something I'm proud of. My hubby poured his love into making it and I can't begin to count the hours I've put into researching, developing, and writing all the curriculum I use for the labs. This page is dedicated specifically for the two items that I use in the lab that were Pinterest Inspirations: chalkboard paint and the cup light.
 
I know I'm going out of order, but I want to talk about the light first...because it's awesome and has such a bigger impact that I even imagined it would.  The light is simply made: plastic cups, a stapler, a light cord, and I used zip ties to connect the light and cups.  I followed all the directions here  and the author did a great job of explaining it well. My light cord was purchased at IKEA for $2.99 and the blue cups from The Dollar Tree for a dollar for 16. I estimate that I spent about $10. The light is huge...nearly three feet in diameter and it lets out only a little light, which is perfect. I use my projector almost all day and need dim lighting. The students called it a disco light and because they know I geek out to recycling, they thought it was awesome that is made from recyclable materials :)

Now, on to the chalkboard paint.  I wanted the blue surfaces on the desk to be written on like blueprint paper, just like on MythBusters, so it was necessary to find chalkboard paint. Through Pinterest, I found Martha Stewart's recipe which called for unsanded grout and paint. That's it! Measure accordingly, mix, roll on, condition (taking chalk and writing, then wiping off), and enjoy! I was so surprised with how easy it was...and how awesome it looks!  THANKS PINTEREST!!!

Pinterest Inspiration: Pets in the Classroom Grant!!

I'm thankful for Pinterest for so many reasons.  While perusing one day, I came across a Pets in the Classroom pin.  Pets in the Classroom provides grants for teachers looking to establish a classroom pet in their rooms and/or provide funding for pets already being cared for in the classroom. Since I have seven hermit crabs, two hamsters, and a class bunny (all who have needed new homes from other students/teachers), I was quite intrigued. I filled out the application. I honestly didn't expect much because I knew this was a national campaign and I was just one teacher. But, lo-and-behold, I received a letter this week congratulating me on being awarded $100 for my animals! Woot!!  I cannot wait to buy a surplus of goodies, treats, and food for my babies. Thanks so much, The Pet Care Trust!!

If you are interested in applying for your classroom animal, please be sure to visit http://www.petsintheclassroom.org/ .  They've awarded over 7000 grants in two years, so give it a shot!


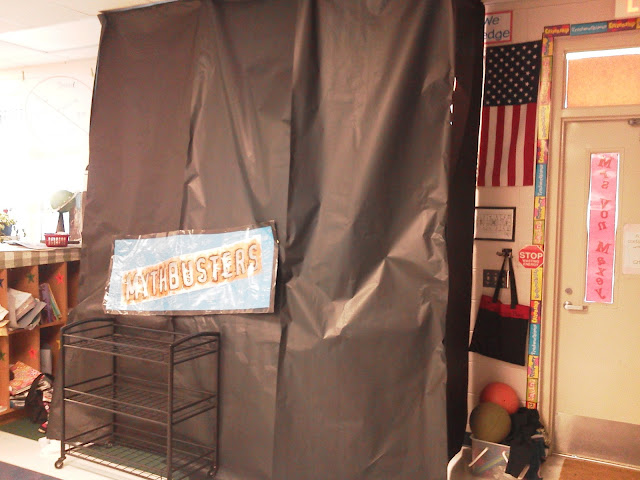
My Classroom: New MythBusters Science Lab!

Each month, I hold an after school MythBusters club where 30 of my students stay from 3:15-5:30 to complete a cool experiment using the scientific method start to finish (data and all), eat pizza, and watch an episode of the real MythBusters show. The fainting goats and creamer cannon are an annual favorite...and you can't forget the Lego Ball!

When I moved my lab into my room, I realized I needed a more proper experiment area and storage. So, after half a year of dreaming and designing, grant writing, and building, my classroom's MythBusters themed Science Lab station is finished. My wonderful husband took my ideas, combined them with his brainstorming, and created the station, while I designed and researched shelving for storage. It is absolutely beautiful! 

 These are the basic shots of the lab. If you'd like to view our photos of the building process, click to our FaceBook album here.


Before: in August, I changed my classroom library to my current science station. I wanted to get my science equipment out of my closet and in front of my students. I found out quickly that it was difficult to keep organized...and little fingers off of certain things!   


The new storage area: The tall cases are the Billy series from IKEA with a glass door, keeping small fingers off of important or fragile equipment. The cubbies are HUGE and hold a tremendous amount of items (one of these holds ALL the plastic graduated cylinders I had on the original shelves) 
 
We moved the unit from our garage to the classroom on a Monday, but the next MythBusters wasn't until Thursday. So, to create suspense and anticipation, we kept it a surprise...
The finished lab, sans chalk

Chalked up, just like on the show, with magnet results signs.

My wonderful husband and me!

During the MythBusters club. Our experiment was to determine which bubble solution would produce the largest bubble. Hint: glycerin is amazing!

Excited? ABSOLUTELY!!
 

Pinterst Project: More T-shirt Scarves!

Please forgive the colors in the picture. My camera phone isn't the greatest, but for now it'll suffice...next time i wear it, I'll try for a better shot.

There are some beautiful up-cycled t-shirt scarves floating around Pinterest and this is my third different attempt.  I found the Pin that lead me to the original blog here and I'll admit I was kinda scared when it told me to get creative...on my own. But, I'm glad it did because I had to think about what I wanted to make and how I wanted it to come out. I'm please with how mine finished. This is a red, gray, and blacked themed scarf/necklace/cowl/whatever in the world it is... and I made it for my husband's middle school soccer team's upcoming season. I grabbed a red, black, and gray blood bank t-shirt (because my Dad has a million...he's such a great donor!!) and I started following the directions for cutting in the blog. I began with the multicolor piece and just knotted, braided, and knotted. I then braided the red, which was a tad longer and I knew would be great for layering. The black was shorter and I took three and just twisted them. The lower black ring was just a 2 1/2 in section untwisted, just stretched. I was going for a multi-styled look and I think I got what I wanted. I gathered them in the back, wrapped the ends with spare cloth and stitched it up. The back is a bit chunky, so I can only really wear this when my hair is down, but I like how it turned out! :)

I also made a black replica of the aqua one on her blog, but because of my wonderful camera, it just looked like a black cord. I'll get a better shot of that as well...one day! :)


My Project: Organizing Thread

After a busy evening on Friday of crafting and project making, I spent an hour or so on Saturday giving my closet some love. I hadn't tidied her up in a while, except for the few times I quickly stored stuff away when I knew people were coming over and the potential for Kevin to share his accomplishment for his wifey would increase.  While this may not seem significant (and maybe it isn't), I had a revelation while organizing. I'm obsessed with Roy G. Biv, and I realize that I have since first grade. You know...ROY G BIV...the order of the color spectrum, the order of a rainbow, the order of my box of Crayola crayons?

Yeah, that last one. I realized that I've been organizing my crayons in color order since they were first in my desk as my own. I remember being very particular about it too...when one came out, the other had to go back in its place. I am still like this today. My blouse/shirt section of my closet is organized into to major sections: career / Friday wear...and each of those is organized into ROYGBIV. Our preschooler's clothes are as well. So, when I organized my thread, making sure the thread was in the slit on the spools and the loose threads facing down (yes, I had to be that specific), I realized I already had them in order. So why? The older I get, the more difficulty I have with staying focused on a task and I think I was the same when I was younger (Pinterest doesn't help, haha, and Life Got in the Way [a Sister Hazel song]). It never affected me academically so I must have compensated. It could also be generated from being constantly on the go as a young adult and instead of growing weary, my body adapted and took on the doing-amillion-things-at-once skill (curse?). Anyway, I realized that I HAD to have my colors this way (it bothers me when they aren't...) because this was how my mind worked. It was a way of helping me to focus. My mind knew what I needed. Man, that's a scary thought.

So, I will continue my obsession with Roy G. Biv...so long as my husband doesn't get jealous ;)


By the way, to hold the smaller bobbins in place I hot glued gold rope string to the first set of holders, keeping them in place. I had to learn the hard way on that one...

Pinterest Inspiration with an April Twist: Homemade Shower Cleaner

I try incredibly hard to be green and I was thrilled when I found a recipe for homemade shower cleaner here.  Her recipe calls for vinegar and Dawn, and I used a Green twist and used my 97% natural Clorox green works dish detergent.

I'm honestly not sure if you're to measure in cups or ounces, so I measured in ounces on my kitchen...but I don't think you can really mess this up.  Basically take equal ounces vinegar and soap. Heat the vinegar in the microwave until hot so it will help to mix the soap well. Pour vinegar into a spray bottle, followed by the dish soap. Swirl around to mix and you're done!  I used it yesterday when I was in the shower (yes, that's how I clean my shower...) and I was amazed at how well it did on the soap scum on the shower door. I took an old tooth brush and sprayed our white shower tile grout and it brightened up nicely....and very quickly too.  I just keep it on the towel rack that is in our shower and will use it as needed. No more need for full shower cleaning days!  I think FlyLady would be proud :)

All in all, I give this big thumbs up...one that I will use regularly from now on!  Now, go make some yourself and take pride in knowing what ingredients are in the products you use!

Outdoor Life: Oh, the Importance of Bike Maintenance

Today I learned a hard lesson: always check your bike's components before riding. My hubby and I went on a local mountain bike course today to get some fresh air and exercise. We haven't had much rain here in Florida, so the sand and leaves were a bit loose and I found myself having to break really hard to gain control (but it was so much fun!!).  I could tell my rear break was weak and resolved to fixing it before the next ride. i haven't been in the habit of checking my bike before a ride, a mistake, I know.

The trail exits right on to pavement and we'd gained some speed coming back in to the lot with our car. I had been leaning forward on my handle bars aerobars style and we began to approach our car. I pulled hard on the breaks and got no juice from the right (rear break) and complete juice from the left (front break) and if you learned anything from physics, that made for a perfect flip. All my momentum from the rear lifted me forward, face first on to the pavement and the bike rolled over me. Thankfully i was OK, banged and scraped up, but nothing broke. My helmet was my saving grace. Not only did it scuff the ground, my bike seat came flying over and knocked into it. I had to lay there for a while (in front of other riders and visitors at the neighboring dog park) but I am proud I didn't cry. God did i want to though!  I did let the tears fall when my husband helped clean me up at home with Hibiclens. Ouch. All in all, I scrapped my chin, shoulder, and elbow, as well as bruised my thigh. But, no stitches, broken bones, or concussions...just bruised pride and I can deal with that. It's my style...what I call Aprilisms.  Oh! But I didn't break my phone (that's another story...later).


Anyway, lesson here is check your equipment and always wear a helmet. It sure saved me today!!

Pinterest Inspiration: Ruffled T-Shirt Scarf and Rosettes

Today was the first day back at school for the new year, and I'd been obsessed with Pinterest while we were gone. I wanted to come back with something new, so I decided to go for a trifecta. I made a gentle green t-shirt scarf (instructions here!) and rosettes to match. The rosettes were used the instructions for coffee filter roses, but they turned out the same. Here's that blog.  The t-shirt was one that Kevin was donating, so free is awesome! 

The hair comes one awesome hair stylist, Kate. I found her via Pinterst and her blog of hair styles is wonderful. Even better for me is that she explains everything..even what's in her hair and how to curl it. I never knew how to properly curl my hair...well, now I do and I LOVE it! It has gotten so many compliments and my husband is nearly mush when I wear it this way. <3  Thanks a million, Kate!!!!

Pinterest Inspiration: Denim Rosette Necklace

I had my first experience with Mod Podge today! I've been meaning to pick some up, but didn't and luckily our art teacher was giving loads away. Thanks to a friend for picking some up for me, I now have a great supply! I saw denim rosette necklace and thought it was cute, but this time, i didn't have all the pearls with holes wide enough to fish ribbon through...just enough for the insides. I followed all the directions, found here, except my rolls were wider because I had to use a straw instead of a skewer. And, let me tell you, Mod Podge is awesome but some thick stuff! instead of doing six rolls per flower, I only did five, but I'm happy with it none-the-less. Also, because my flowers were bigger, I wanted the necklace to be smaller and with less detail, hence no side pearls. There was a point while making this that I thought, "This is going to look like crap," but it pulled out nicely. I had large ribbon, so I folded it, pressed it, and then put webbing in between and pressed again. It's a tie ribbon instead of a pull-over-the-head necklace as is in the blog. But, that's ok too :)

Pinterest Inspiration: Denim Bracelet

I happened across this bracelet after I saved a pair of jeans from the donation bag. I had another craft in mind (see Pinterest Inspiration: Denim Rosette Necklace) and figured there must be another craft out there up-cycling jeans. Lo-and-behold, the same blog I found the necklace also had a bracelet. Awesome!


You can find the original blog here, and I can't wait to do this again with different beads and different hued jeans. Everything you see here was found at home...the beads came from a gift bag I was given about a year ago that had the beading on the handle. I recycled the bag and kept the beads, knowing one day they'd have a perfect use. Yep, I was right! :)


My Project: Belt Bracelets


Martha Stewart ribbon bracelets
Pinterest has a way of making you change how you see things...especially that bag of clothes that I was going to donate!  I had it in my car a week and just hadn't dropped it off, so I figured I'd drag it in again, just to make sure there wasn't anything potentially useful there. When I saw our son's sliding belts, I immediately remembered a Martha Stewart bracelet made from D-rings and ribbon. So, I thought...why not!

These were probably the easiest makes ever. I just slid the belt on my wrist, estimated large, and then snipped. I then hot glued the edge under and did a stitch to secure it in place. That.was.it. I think they turned out awesome and my preteen son thinks his is so cool. Star one for Mom today! :)

Belt...before
Belts after!
Preteen son's 'wrist wrap'
My bracelet


Best Christmas Gift Ever!

My husband and I always have believed in having big Christmases and we are always on a hunt to find the perfect gift for each other. Normally it is Kevin who is able to pull an idea from nowhere and surprise me with the greatest gift. This year, the cards fell in my favor for once!

We always make a list but this year Kevin couldn't think of something he would love to have. That left me grabbing at straws until one morning while hunting for mountain bikes on Craigslist, it hit me. We had gone white water rafting on the Pigeon River in North Carolina two years ago. I rode in the big yellow raft with our toddler, while Kevin and our older son Taylor each rode in a "ducky", or single person kayak. They had a blast. I began to research kayaks and canoes, immediately realizing that we had no way to transport them or store them. I went ahead to Sports Authority's website just to check out other objects when I saw it. It was perfect: a tandem, inflatable kayak. Class 3 rapids durable, inflates in less than 10 minutes by way of included foot pump, and it all fits in a bag that easily fits into our trunk. It was perfect...until I went to order it. It wouldn't arrive until at least January 10. I couldn't do that...we wouldn't even be able to use it on our winter break! I decided to check the manufacturer with hopes that they at least sold them online. As luck would have it, they did. I could get one used for less than at Sports Authority, free shipping, and a three year warranty...and it would arrive by December 28th. Doable. It was a risk, but I just knew it would be ok.

Blessing #1: it arrived on Christmas Eve at 3:00 pm
Blessing #2: it was in like-new condition, as if it was only a floor model. Immaculate. Better than I could have ever have hoped for. Sea Eagle truly delivered on this product and I highly recommend it. It's funny how many times people stop what they're doing because they've never seen a really sturdy, inflatable, easy-to-use kayak!

We have taken it out four times now (in a private canal, public canal, across a lake, and down a river) and are sold. It is awesome. My husband calls it the best gift ever. I can't wait to take our 12 year old and small dog out in it. Our preschooler fell asleep in it it rode so gently.  It truly is a perfect gift <3

Food! Best S'mores EVER!!

 
For Christmas, my in-laws gave us a great gift: a fire pit. The weather has been beautiful so we picked up some wood and put my husband's high school Outdoor Ed fire building learning to use. The awesome thing about having a fire is that everyone wants s'mores. We had everything ready, until Kevin had a great idea. I put a bag of Ghirardelli peppermint and dark chocolate squares in his stocking. Instead of us grown-ups using yummy Hersheys, we snuck one of those babies on instead. Little did we know it would be instant heaven. It was just enough chocolate and just enough mint to be perfect. Because the squares are thicker, you have to make sure the marshmallows are good a hot, but regardless, there isn't an incorrect way to eat these things. The only problem is that we are down to three squares left...and it's a seasonal product. Hopefully the Ghirardelli at Downtown Disney will have some year-round!

My Project: Small Dog Scarf

Our family was blessed three years ago when we found Chester at our local animal control. He'd been there three weeks; they kept Him longer because of his sweet temperament and after a scare of the kennel contracting distemper, he was ours. I grew up with big dogs, so I never thought I'd be the girl with a chihuahua...in our case a chihuahua/Jack Russell mix, I believe. But, he is our sweet, calm, quiet little boy and I wouldn't trade him for the world. Because he is so small (and truly needs sweaters and such...) I knitted him a scarf with spare fringy yarn I had in the bottom of my knitting drawer. Using size 13 needles and casting on five or six loops, I knitted this little thing in just a bit. It may not really keep him warmer, but he sure is durn cute in it!!

It wasn't easy to take his picture. For whatever reason, when I put it on him, he must have felt humiliated (poor dude!) and I had to say, "Go bye bye!" for the big ears to perk up.  :)